Friday, October 7, 2011

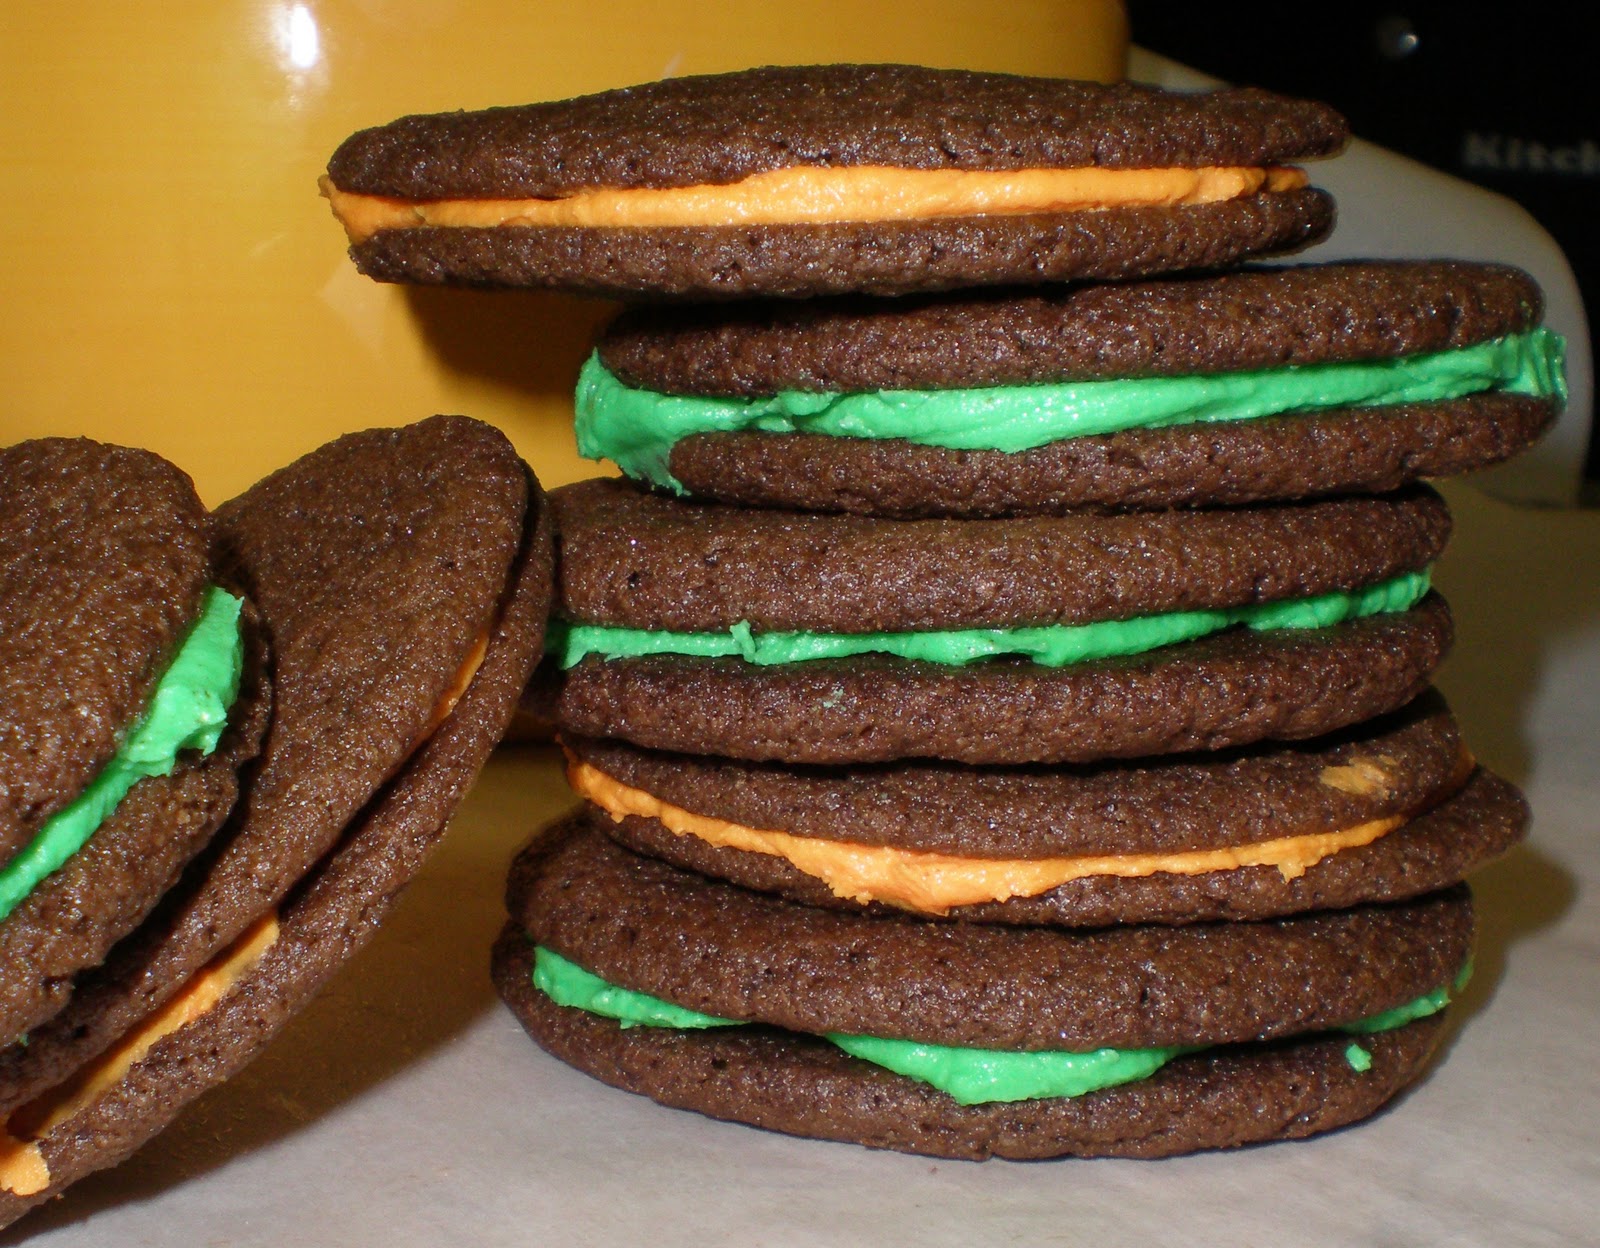
Homemade Halloween Oreo Cookies


Since it's October, I thought it was just about time for me to get started on Halloween treats!

I've been looking at food blogs a lot and came a cross this easy to follow recipe. Made it last night and thought they were really yummy. There such cute cookies specially if you have kids or are going to any Halloween parties. This would be a great recipe for that!

To make them even more prefect for Halloween I divided the cream filling and added green and orange food coloring. You can add any other colors you may like for instances purple or red would be great too. Any thing that screams Halloween! Recipe below!


Enjoy!
Liz
xo

Homemade Halloween Oreo Cookies

Ingredients:
For the cookies:
  • 1 1/4 cups all-purpose flour
  • 1/2 cup unsweetened or Dutch process cocoa powder
  • 1 tsp baking soda
  • 1/4 tsp baking powder
  • 1/4 tsp salt
  • 1 to 1 1/2 cups sugar (Use 1 cup for a truer-to-original Oreo wafer or more sugar for a sweeter chocolate cookie)
  • 10 tbsp (1 stick + 2 tbsp) unsalted butter, at room temperature
  • 1 large egg
For the cream filling (white):
  • 4 tbsp (1/2 stick) unsalted butter, at room temperature
  • 1/4 cup vegetable shortening
  • 2 cups confectioners’ sugar, sifted
  • 2 tsp vanilla extract
Instructions:
  1. Preheat the oven to 375˚ F.  Line two baking sheets with silicone baking mats or parchment paper.
  2. In a food processor or the bowl of an electric mixer, combine the flour, cocoa powder, baking soda, baking powder, salt, and sugar.  Mix briefly to combine.  Add the butter to the bowl and pulse or mix briefly to incorporate.  Add in the egg and mix until the dough forms a cohesive mass.
  3. Scoop between 2 tsp to a scant tbsp of batter (depending on how large you want them) onto the baking sheet.  Continue scooping, spacing the dough balls a couple of inches apart.  With moistened fingers, gently press down on the dough balls to flatten slightly.  Bake for 9-11 minutes (closer to 9 minutes for smaller cookies), rotating the pans halfway through baking.  Transfer the baking sheets to a wire rack and let cool completely until the cookies are firm and set.  Be sure the cookies are completely cooled before filling.
  4. To make the filling, combine the butter and shortening in the bowl of an electric mixer.  Beat on medium-high speed until smooth.  Add the confectioners’ sugar to the bowl and mix on low speed just until incorporated, then increase the speed to medium-high and beat until light and fluffy, about 2-3 minutes.  Blend in the vanilla extract.
  5. To assemble the cookies, pair them up by size.  Use a pastry bag fitted with a plain round tip to pipe a swirl of filling onto the flat side of one cookie of each pair.  Sandwich together with the remaining cookie and press down so that the filling reaches the edges.
Yield: 20 to 30 sandwich cookies, depending on the size

Source: Retro Desserts by Wayne Bachman

Monday, October 3, 2011

NOTW ~ French Tips


 I noticed that every time I go to a drug store all I wanna do is check out the nail polishes! I love colors that catch my eyes like sparkly/glittery colors! 

I was running low on one of my favorite Sinful Colors Glitter polish in Pearl Harbor. So I pick up a different color in Smoking Hot 859.

So I did a french tip nails. I used scotch tape to help me along the way. (My nails are a bit yellow underneath because of the green polish I had on my last NOTW.) But they came out really nice with the glittery nail polish on top of the white tips. So Pretty! ^_^


OMG! I can't get over how pretty they look! I freaking love this color! It's very pretty so sparkly and cute! I think I love it better than Pearl Harbor! 

~~~~~~~
Used:
Seche Clear (Base Coat)
Sinful Colors in Snow Me White 1
Sinful Colors in Smoking Hot 859
Seche Vite (Top Coat)
~~~~~~~

Thanks for reading!

Liz
xo

Sunday, September 25, 2011

NOTW

Going Green!!!


I'm loving Green! Not because it's the color of money...well maybe a little...lol But I probably own about two green nail polishes. So I feel like doing another nail polish haul soon! ^_~

I'm using Confetti Nail Colors in My Favorite Martian and Party Palace Blue.


I'm loving these two colors. It looks very pretty but it goes on very sheer. I applied about 4 coats of My Favorite Martian, and 3 coats of (on my ring finger) Party Palace Blue. Also applied Seche Clear (base coat) & Seche Vite (top coat)
~~~~~~
Pros:
Cost cheap
Lots of pretty colors to choose from
Dries pretty quick

Con:
Very sheer
~~~~~~
Have a Great Weekend guys!

Thanks for reading!

liz
xo

Friday, September 23, 2011

Mini Haul

I was at CVS yesterday and picked up three things. Two nail polishes and a lip balm.

I picked up Maybelline Baby Lips and two Confetti nail polishes in 097 My Favorite Martian and 083 Party Palace Blue. F.Y.I none of these items were on sale!

Maybelline Baby Lips is a moisturizing lip balm with spf 20. It claims to give you up to 8HR Moisture + Lip Renewal. It also claims to keep lips less dry, less rough, more supple better looking lips.


Now I don't know if all that is true cause I only tired it out once and from what I can tell it does make my lips more softer and supple. It didn't last 8 hours but I wasn't expecting it to last long. It did make my lips look a bit more plump, which I loved!


The lip balm is in 30 Peach Kiss. It's a very pretty color, but it does go on sheer. They do have other colors of this lip balm. 


As you can see it's very sheer and it also has some shimmer to it!

Over all I'm liking this product! 

Okay Next up is...


Confetti Nail Colors in (L) 083 Party Palace Blue & (R) 097 My Favorite Martian.

Party Palace Blue is a very pretty glitter polish with some pink flecks in it and My Favorite Martian is a gorgeous green polish with shimmer flecks in it. Can't wait to paint my nails!

That's all for my mini haul! Look forward to some nail polish swatches soon! ^_^

Thanks for reading!

Liz
xo

Thursday, September 22, 2011

Natural FOTD

Today I decided to do a light natural face and eyes. Nothing special just something quick and easy. Maybe I should start making tutorials on youtube...

Anyways here's my fotd today!


Very light and natural! ^_^

Here's a close up on the eyes!


As you can see I didn't go heavy on the eyes. 
~~~~~~~~~~~~~~~~~~~~~~~~~~
Products Used:
Face:
Laura Mercier primer
Oringins VitaZing Moisturizer
Garnier Fructis Under Eye Roller
Maybelline Power Concealer
Maybelline Dream Matte Powder

Cheeks:
Tarte Amazonian Clay Blush in Peaceful
Stila All Over Liquid Luminizer

Eye:
NYX Eyeshadows in
Aloha (lid, brow & lower lash line)
Salmon (crease)
Peach (crease & lower outer corner lash line)
Tarte SmolderEYES liner in Fig
Tarte Lights, Camera Lashes Mascara

Lips:
Revlon lip gloss in Pink Whisper
~~~~~~~~~~~~~~~~~~~~~~~~~~
That's all of it, I think! lol

I also went to CVS today and got a few nail polishes and lip balm so look forward to that!

Have a great weekend guys!

Liz
xo

Related Posts Plugin for WordPress, Blogger...